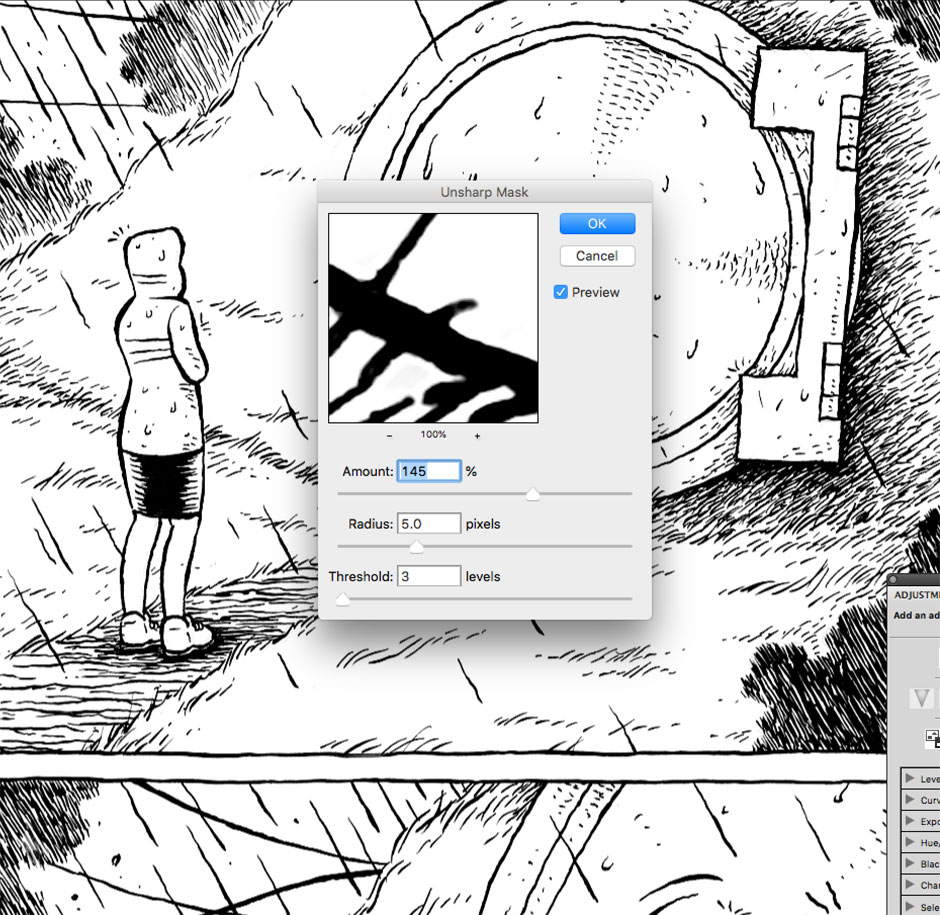
my current scanning process
It’s one thing to draw in pen-and-ink, but quite another to reproduce it. Back when I was photocopying everything, I had little control over what I got. I would go to the copy place, try a sample on each available machine, and then use the best one. But that was a long time ago. Since then, it’s all been about scanning.
With line art, one can always just scan 1200dpi bitmap. But early on I found that this made my work muddy and ugly. So I followed Jordan Crane’s advice in Re: A Guide to Reproduction. Basically, he turned me on to the “threshold” command in Photoshop. I would scan at 600dpi greyscale and then adjust the threshold in Photoshop. Yet even this left something to be desired; with my finer ink work, thinner lines got lost. So I started using the “levels” command first and then the using threshold (I may have gotten this step from Jessica Abel and Matt Madden). Adjusting the levels got rid of a lot of pencil marks and helped sharpen the scan so less lines would be lost when I went to threshold. Well, I got a new scanner a few months ago and so was revisiting the whole process. Trying to understand what an “unsharp mask” was I stumbled onto an article about scanning line art by Paul Diamond Blow. Basically, he follows the same process I just outlined, but he adds one extra step: the unsharp mask filter. I’ve started using this method and have been really impressed with the results. The final version looks a lot more like the original art work. The lines are thin and crisp. Hatchwork doesn’t get muddy or lost. I have yet to print a book after using this method, so I guess I can’t give my unmitigated endorsement for this method. But the printouts I’ve been doing at home look good.
So here’s the process:
- scan in greyscale at 600dpi
- save as a tiff and open in Photoshop
- in the layers palette select “Levels” under the “create new fill or adjustment layer” dropdown (the circle with the diagonal line)
- in the first slider, I set the numbers to about 20 – 1.00 – 130 (this can vary depending on the scan)
- flatten the image
- set the image size to 1200dpi
- under Filter go to Sharpen > Unsharp Mask…
- set the Amount to 145%, the Radius to 5.0 pixels, and the Threshold to 3 levels
- then go to Threshold under the same adjustments dropdown as Levels
- set the Threshold to 110 (this is less than what Photoshop suggests)
- flatten the image
- convert back to 600dpi


Thanks Nijomu,
This is really insightful, looking forward to your new Tapas series.
Thanks. Glad it was helpful.
This is SO helpful. Thanks for sharing!
Hello, Sir!
Thanks for posting this! 🙂